Hello crafty friends! I'm here with you and I want to share a tutorial today on the 3D Rainbow (Lori's SVG, Silhouette). And if you know me, then you know I'm always looking at the SVGs and thinking of other holidays/occasions to create the files for. The 3D Rainbow box I have for you today is for Easter but the file was originally created for St. Patrick's Day. I used the Lori Whitlock Spring Fling and Easter Wishes papers on this project and I think it turned out so very cute! The added flower stickers are from the Easter Stickers (Lori's SVG, Silhouette).
To start this project, let's get to cutting out the pieces in the file. While I had the project pulled up in my Silhouette design studio, I changed the colors to get an idea of how I wanted this project to look. I chose softer Easter colors.
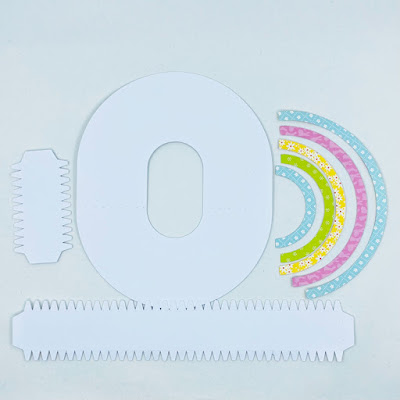
Here are the pieces cut out. I used a sturdy piece of white cardstock for the main box piece. If taken care of while storing, these pieces will last over the years! I still decorate my house with Lori Whitlock projects from a few years ago.
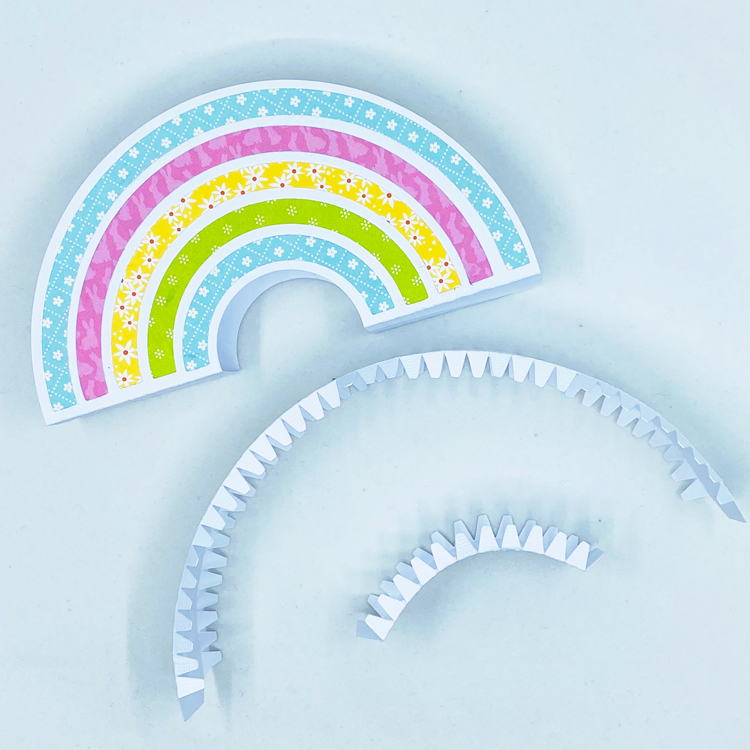
Next is to add the rainbow pieces. I find it easier to adhere these pieces down when the box is flat on my desk. To help with lining up the rainbow, I folded the box piece so I could see where the line is. Finish adhering all of the pieces down and we are ready to move onto the next step.
Next is putting the tabbed pieces on to make the actual box part of this project. First I conditioned the pieces to curve same as the box and then folded the tabbed pieces in.
I found it easiest to adhere the tabs down to the cardstock first.
Tip: Start with adhering the front first because of it being the most viewed side!! I adhered the front first so that I could move the pieces around with my fingers and get it just right. Now add dots of glue to the back side tabs to close the box up.
A little tip I have on keeping the front and back up while the glue is drying is to use little pieces of washi tape. The pieces of washi will come right up without tearing the paper.
After the glue is completely dry (and washi gone) it's time to have fun decorating your sweet little rainbow!
While working on this project, I was thinking it would look absolutely adorable on my mantle with my Easter bunnies or on my tiered tray over in the kitchen!
Thanks for stopping by today!


No comments:
Post a Comment