Hello crafty peeps! I'm here with you today to share a tutorial on creating planner dashboards. I've been doing this all year long because I feel there are so many of Lori's svg cuts that create a very unique dashboard!

To start off I needed an A5 planner template so I would know how to resize all of my svg pieces. I created this template myself by scanning one of my pages and importing it into my Silhouette program to get the cut lines I needed.

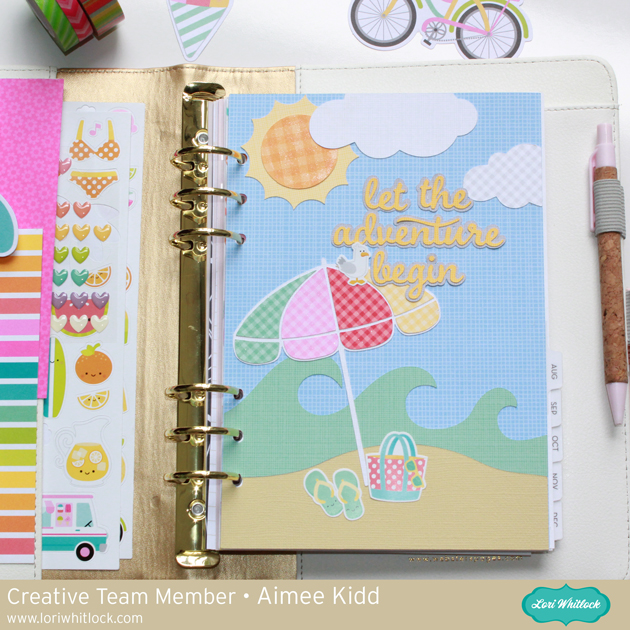
I pulled up the A2 Beach Card svg file and deleted all of the pieces I didn't need which are the card base, card front panel piece, and the sentiment tag. I know this is a card svg but I just knew it make a fabulous planner dashboard!

I also pulled up the Cloud Dingbat font to get my title for my dashboard.

I wanted it to stand out so I added an offset cut.

I played around with the sizes of the cuts to get it to fit onto my A5 planner page template.

Here are my pieces after I cut them out with my Silhouette.

And here they are all adhered down to my August A5 planner page with some added decorations. I also ran my Spectrum Noir Sparkle pen over the sun and umbrella.

And here is finished product in my planner! It sets the tone of how I want the rest of my August planner pages to look.
Here is a look at my January dashboard with a Lori Whitlock sentiment svg.

My April dashboard sports the beautiful mason jar svg cut.

There are so many options of Lori Whitlock svg cuts to create a unique look for all your planner dashboards!
A2 Beach Card svg - Lori Whitlock shop or at the Silhouette Design Studio
Cloud Dingbats Font - Lori Whitlock shop or at the Silhouette Design Studio
Cold Outside - Lori Whitlock shop or at the Silhouette Design Studio
Mason Jar - Lori Whitlock shop or at the Silhouette Design Studio
And I leave you with... "Happy Planning" using some Lori Whitlock SVGs!!
No comments:
Post a Comment